Skip to content

Installation guide – Gravirano Explore

Your handmade wooden map is one step away from transforming your space.

Before you start installing

Check that you have the following tools and materials:

Before you start installing

Check that you have the following tools and materials:

All the wooden pieces of the map

(included in the set)

Tape measure

(not included in the set)

Wooden mounting templates

(included in the set)

Spirit level

(recommended)

Double-sided mounting tape

(included in the set)

Scissors

(not included in the set)

All the wooden pieces of the map

(included in the set)

Double-sided mounting tape

(included in the set)

Wooden
templates for
installation

(included in the set)

Scissors


(not included in the set)

Spirit level

(recommended)

Tape measure

(not included in the set)

Step-by-step installation instructions

Step 1 – Preparing the wall

Choose the place where you want the map to go.
Measure the space to make sure the map will fit the dimensions of the wall.
Unpack all the wooden pieces and take a moment to get familiar with their shapes and layout.

Step 1 – Preparing the wall

Choose the place where you want the map to go.
Measure the space to make sure the map will fit the dimensions of the wall.
Unpack all the wooden pieces and take a moment to get familiar with their shapes and layout.

Step 2 – Applying the double-sided mounting tape

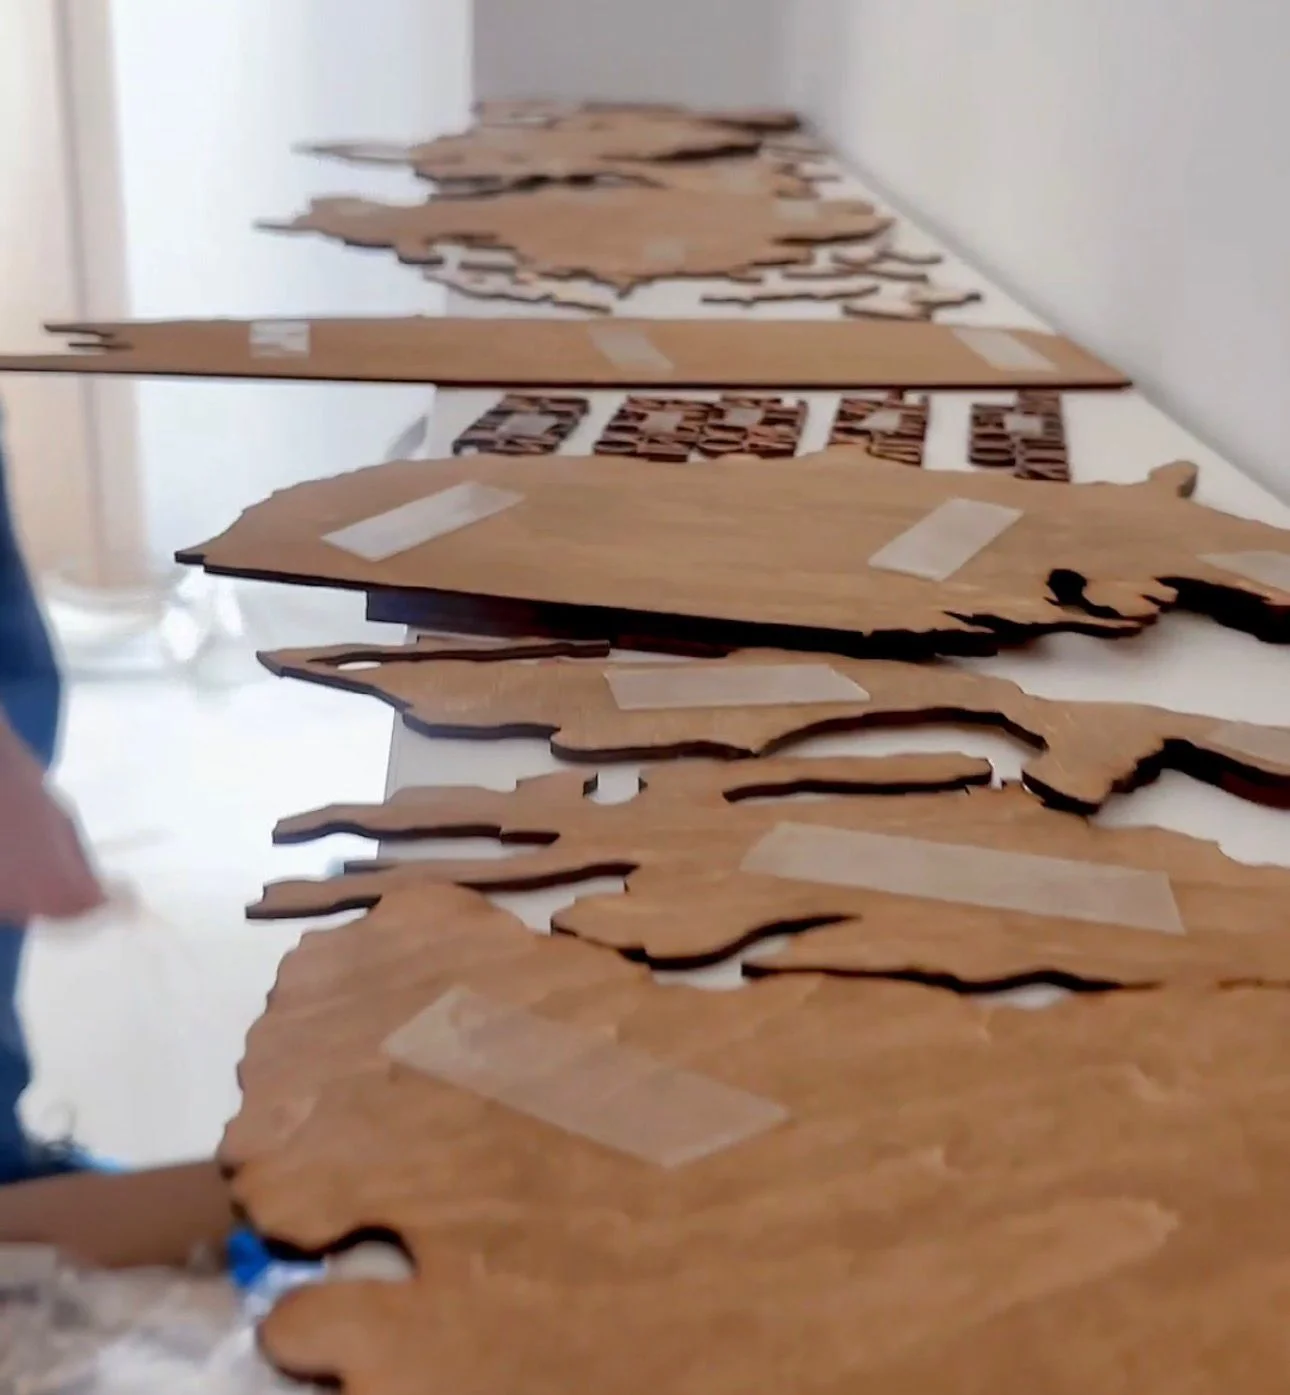
Stick the included double-sided tape to the back of each wooden piece.
For larger countries, use several strips to ensure a stronger, more stable hold.

Step 2 – Applying the double-sided mounting tape

Stick the included double-sided tape to the back of each wooden piece.
For larger countries, use several strips to ensure a stronger, more stable hold.

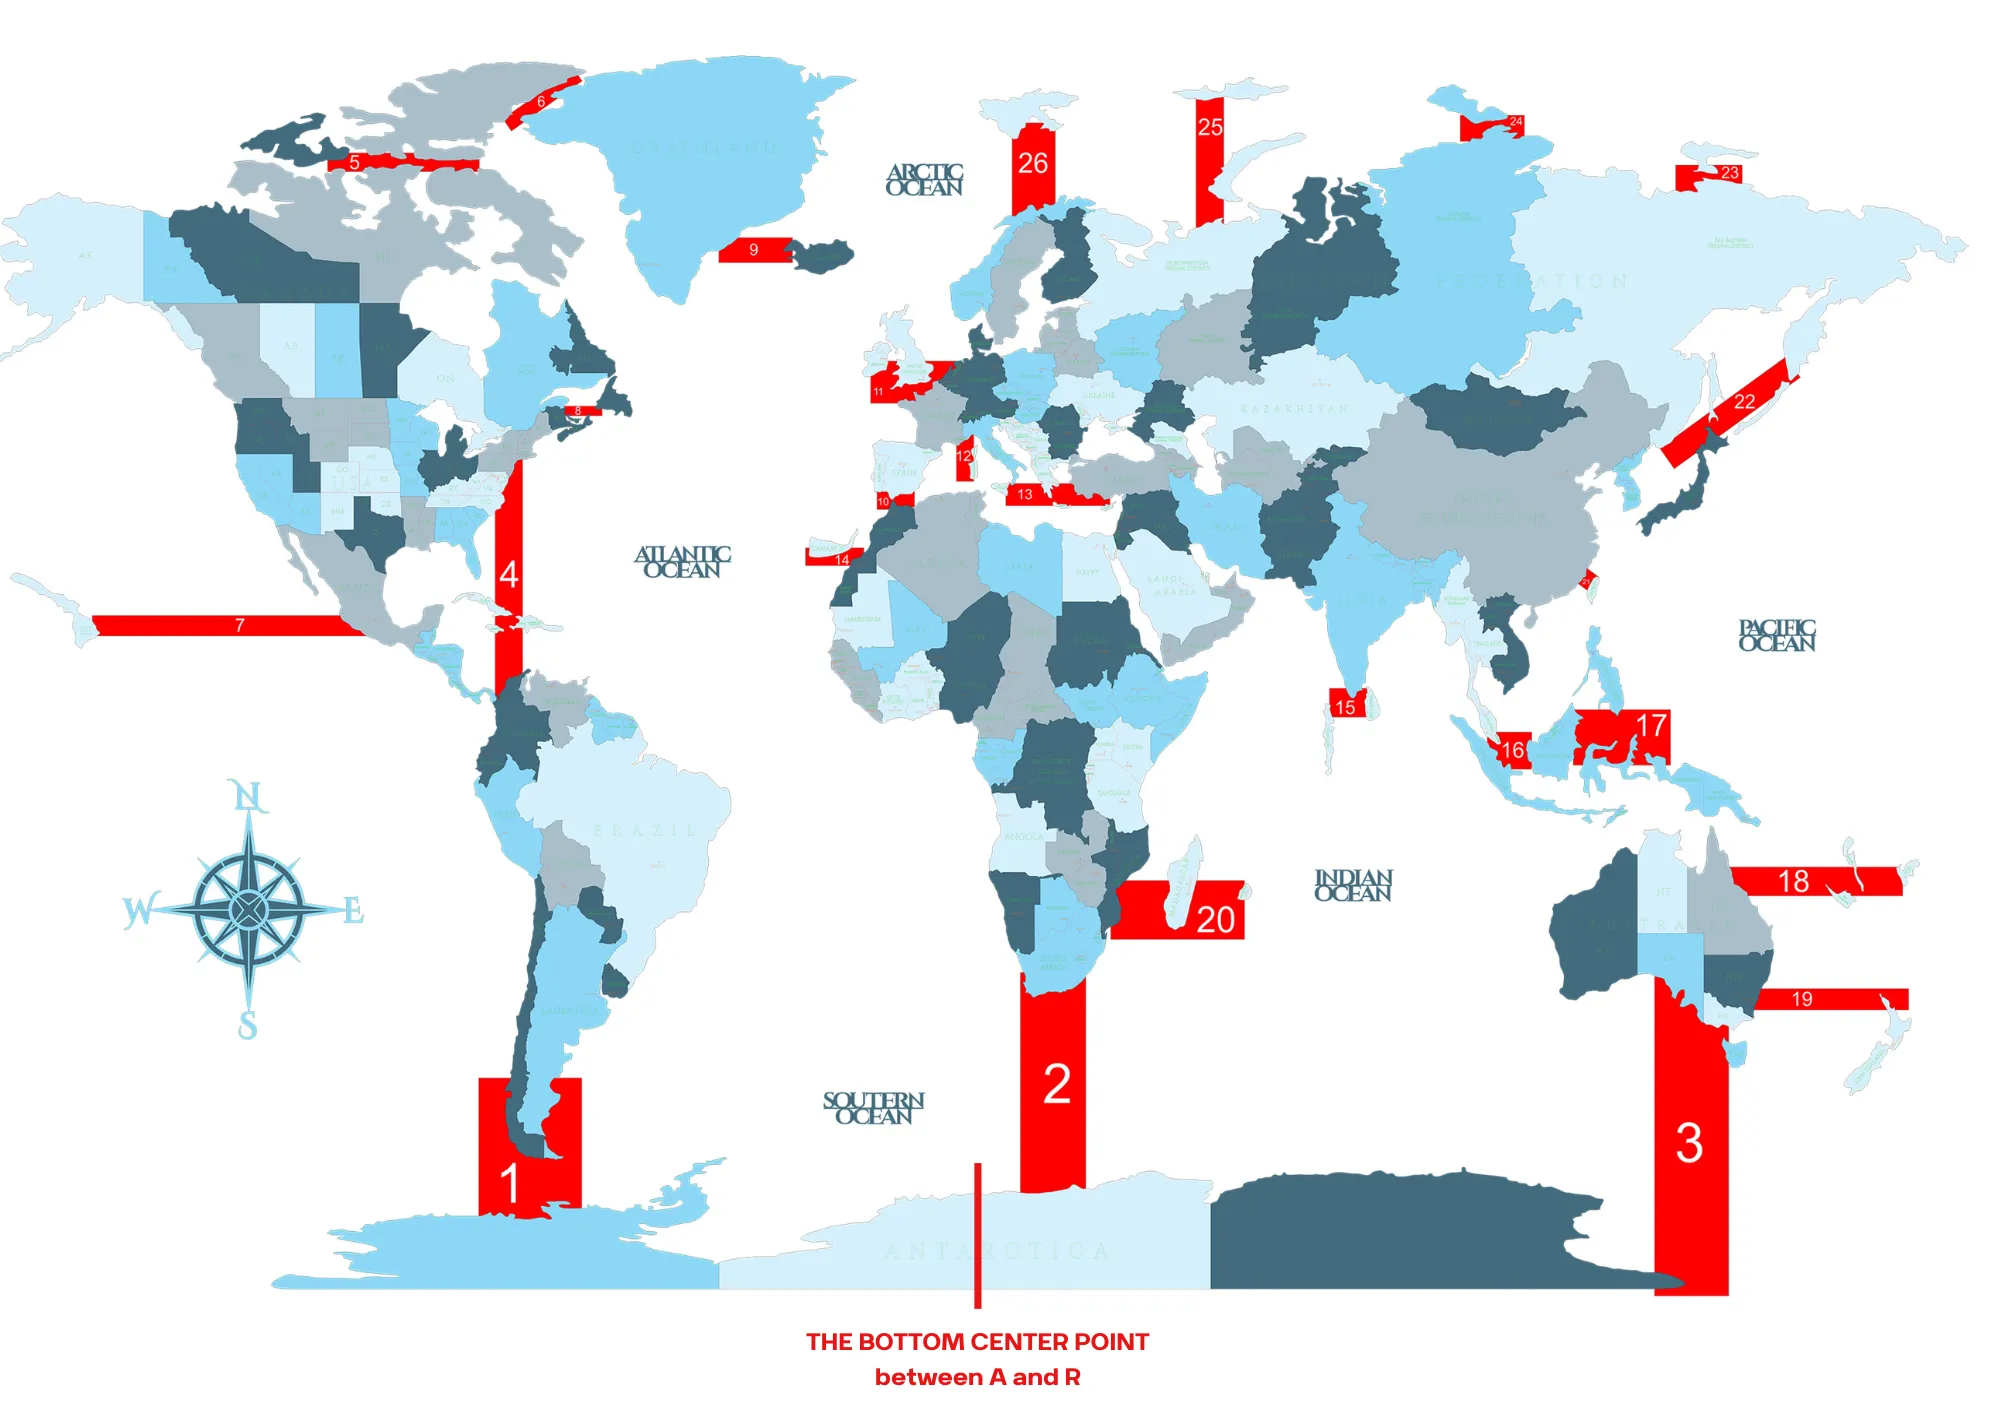
Step 3 – Start with Antarctica (the central reference point)

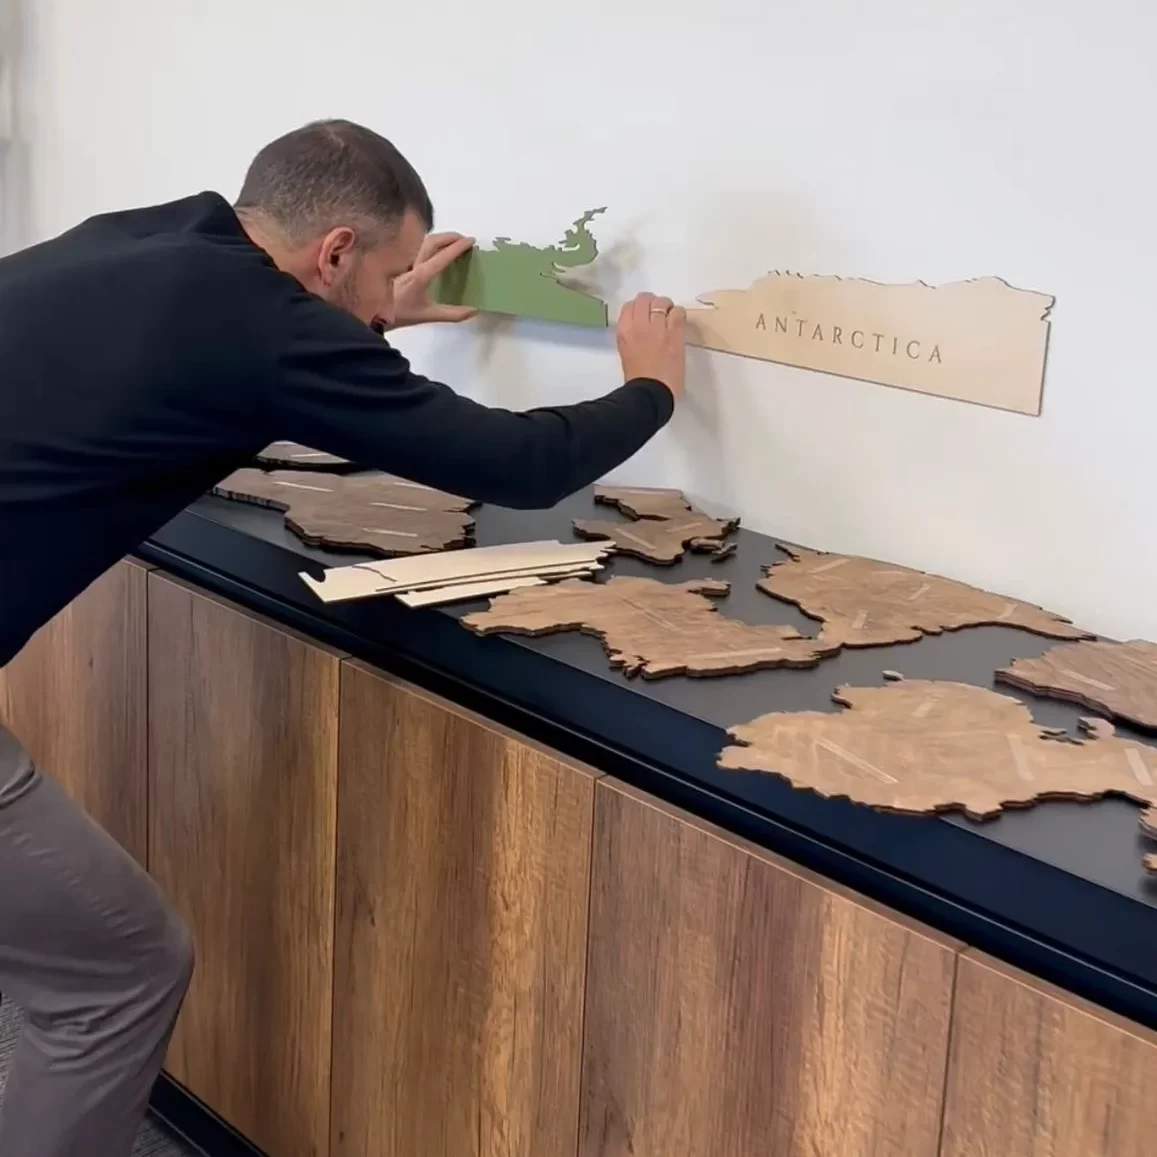
Installation starts with Antarctica, which serves as the central base for the whole map.

Centring the map

Antarctica must be placed exactly in the centre.
The centre point of the whole map corresponds to the middle between the letters “A” and “R” in the label Antarctica.

Levelling

Place Antarctica horizontally using a spirit level.
Once it is correctly centred and levelled, the rest of the map is arranged using the templates.

Step 3 – Start with Antarctica (the central reference point)

Installation starts with Antarctica, which serves as the central base for the whole map.

Centring the map

Antarctica must be placed exactly in the centre.
The centre point of the whole map corresponds to the middle between the letters “A” and “R” in the label Antarctica.

Levelling

Place Antarctica horizontally using a spirit level.
Once it is correctly centred and levelled, the rest of the map is arranged using the templates.

Step 4 – Placing pieces with the wooden templates

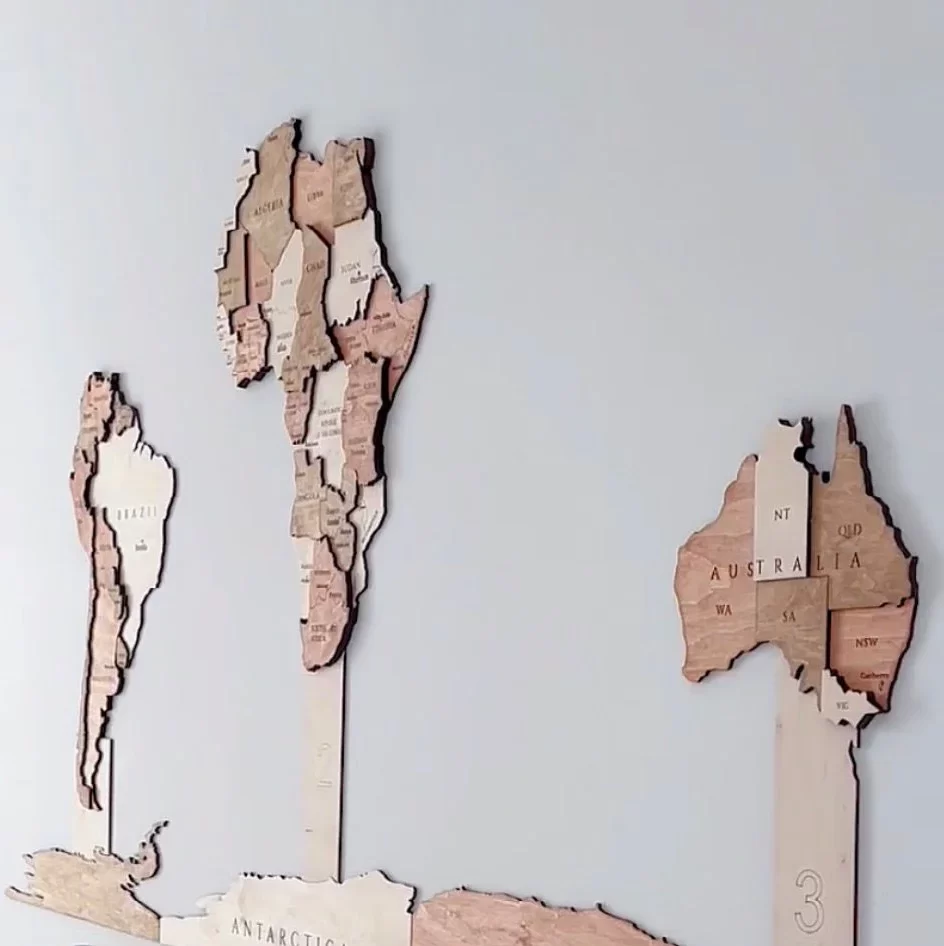
The set includes precisely cut wooden templates, each of them numbered.
These templates show exactly where to place each piece above and around Antarctica.

Follow the numbering in order (1, 2, 3 and so on):

  • Place the relevant template on the wall

  • Fix the corresponding wooden pieces using the double-sided tape

  • Remove the template and move on to the next number

Step 4 – Placing pieces with the wooden templates

The set includes precisely cut wooden templates, each of them numbered.
These templates show exactly where to place each piece above and around Antarctica.

Follow the numbering in order (1, 2, 3 and so on):

  • Place the relevant template on the wall

  • Fix the corresponding wooden pieces using the double-sided tape

  • Remove the template and move on to the next number

Step 5 – Completing the map

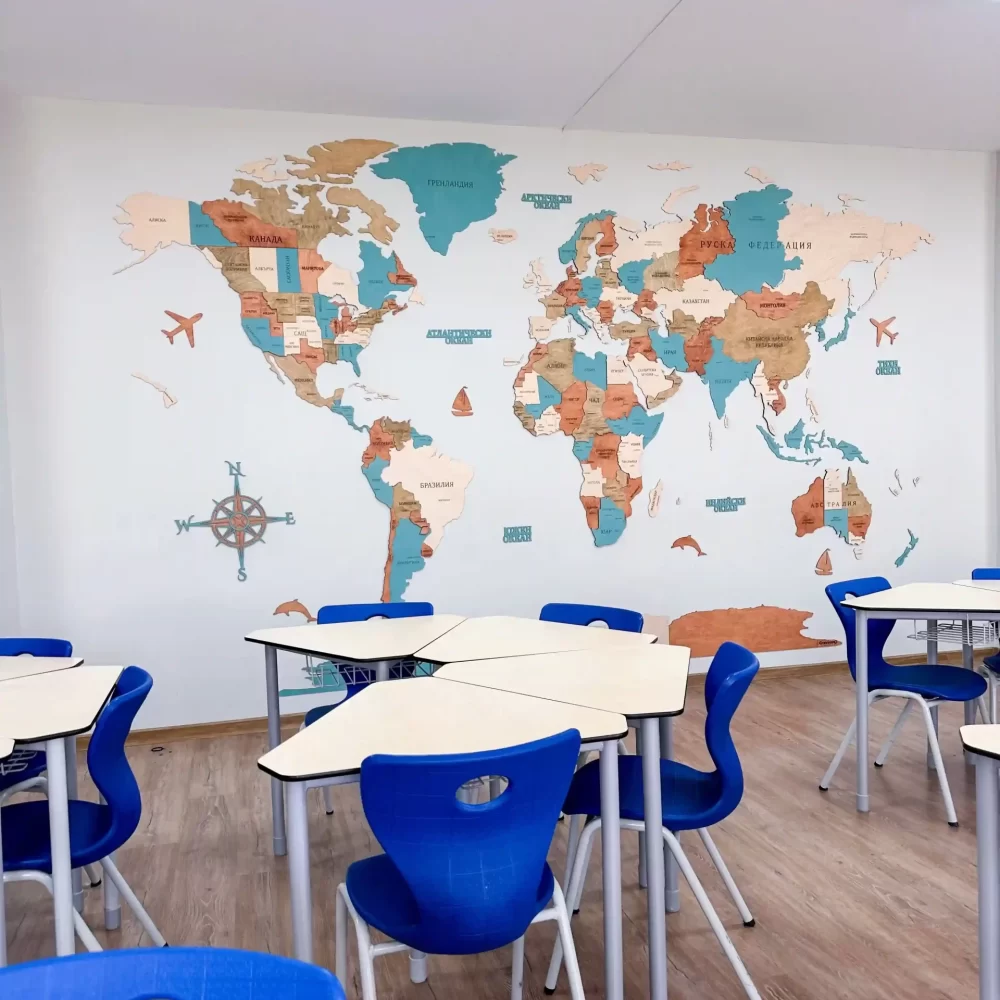
Keep placing all the pieces following the numbered templates until the whole map is fully assembled.
When you have finished, gently press each piece for 5–10 seconds to ensure a firm hold.

Step 5 – Completing the map

Keep placing all the pieces following the numbered templates until the whole map is fully assembled.
When you have finished, gently press each piece for 5–10 seconds to ensure a firm hold.