
Skip to content

Preparing the wall

01

Carefully measure the wall where the map will be placed. Make sure there is enough space for the dimensions of the chosen model.

02

Clean the surface of dust and grease so the mounting tape and spacers grip better.

03

Make sure there is a power socket nearby that the power cable will reach.

1

Carefully measure the wall where the map will be placed. Make sure there is enough space for the dimensions of the chosen model.

2

Clean the surface of dust and grease so the mounting tape and spacers grip better.

3

Make sure there is a power socket nearby that the power cable will reach.
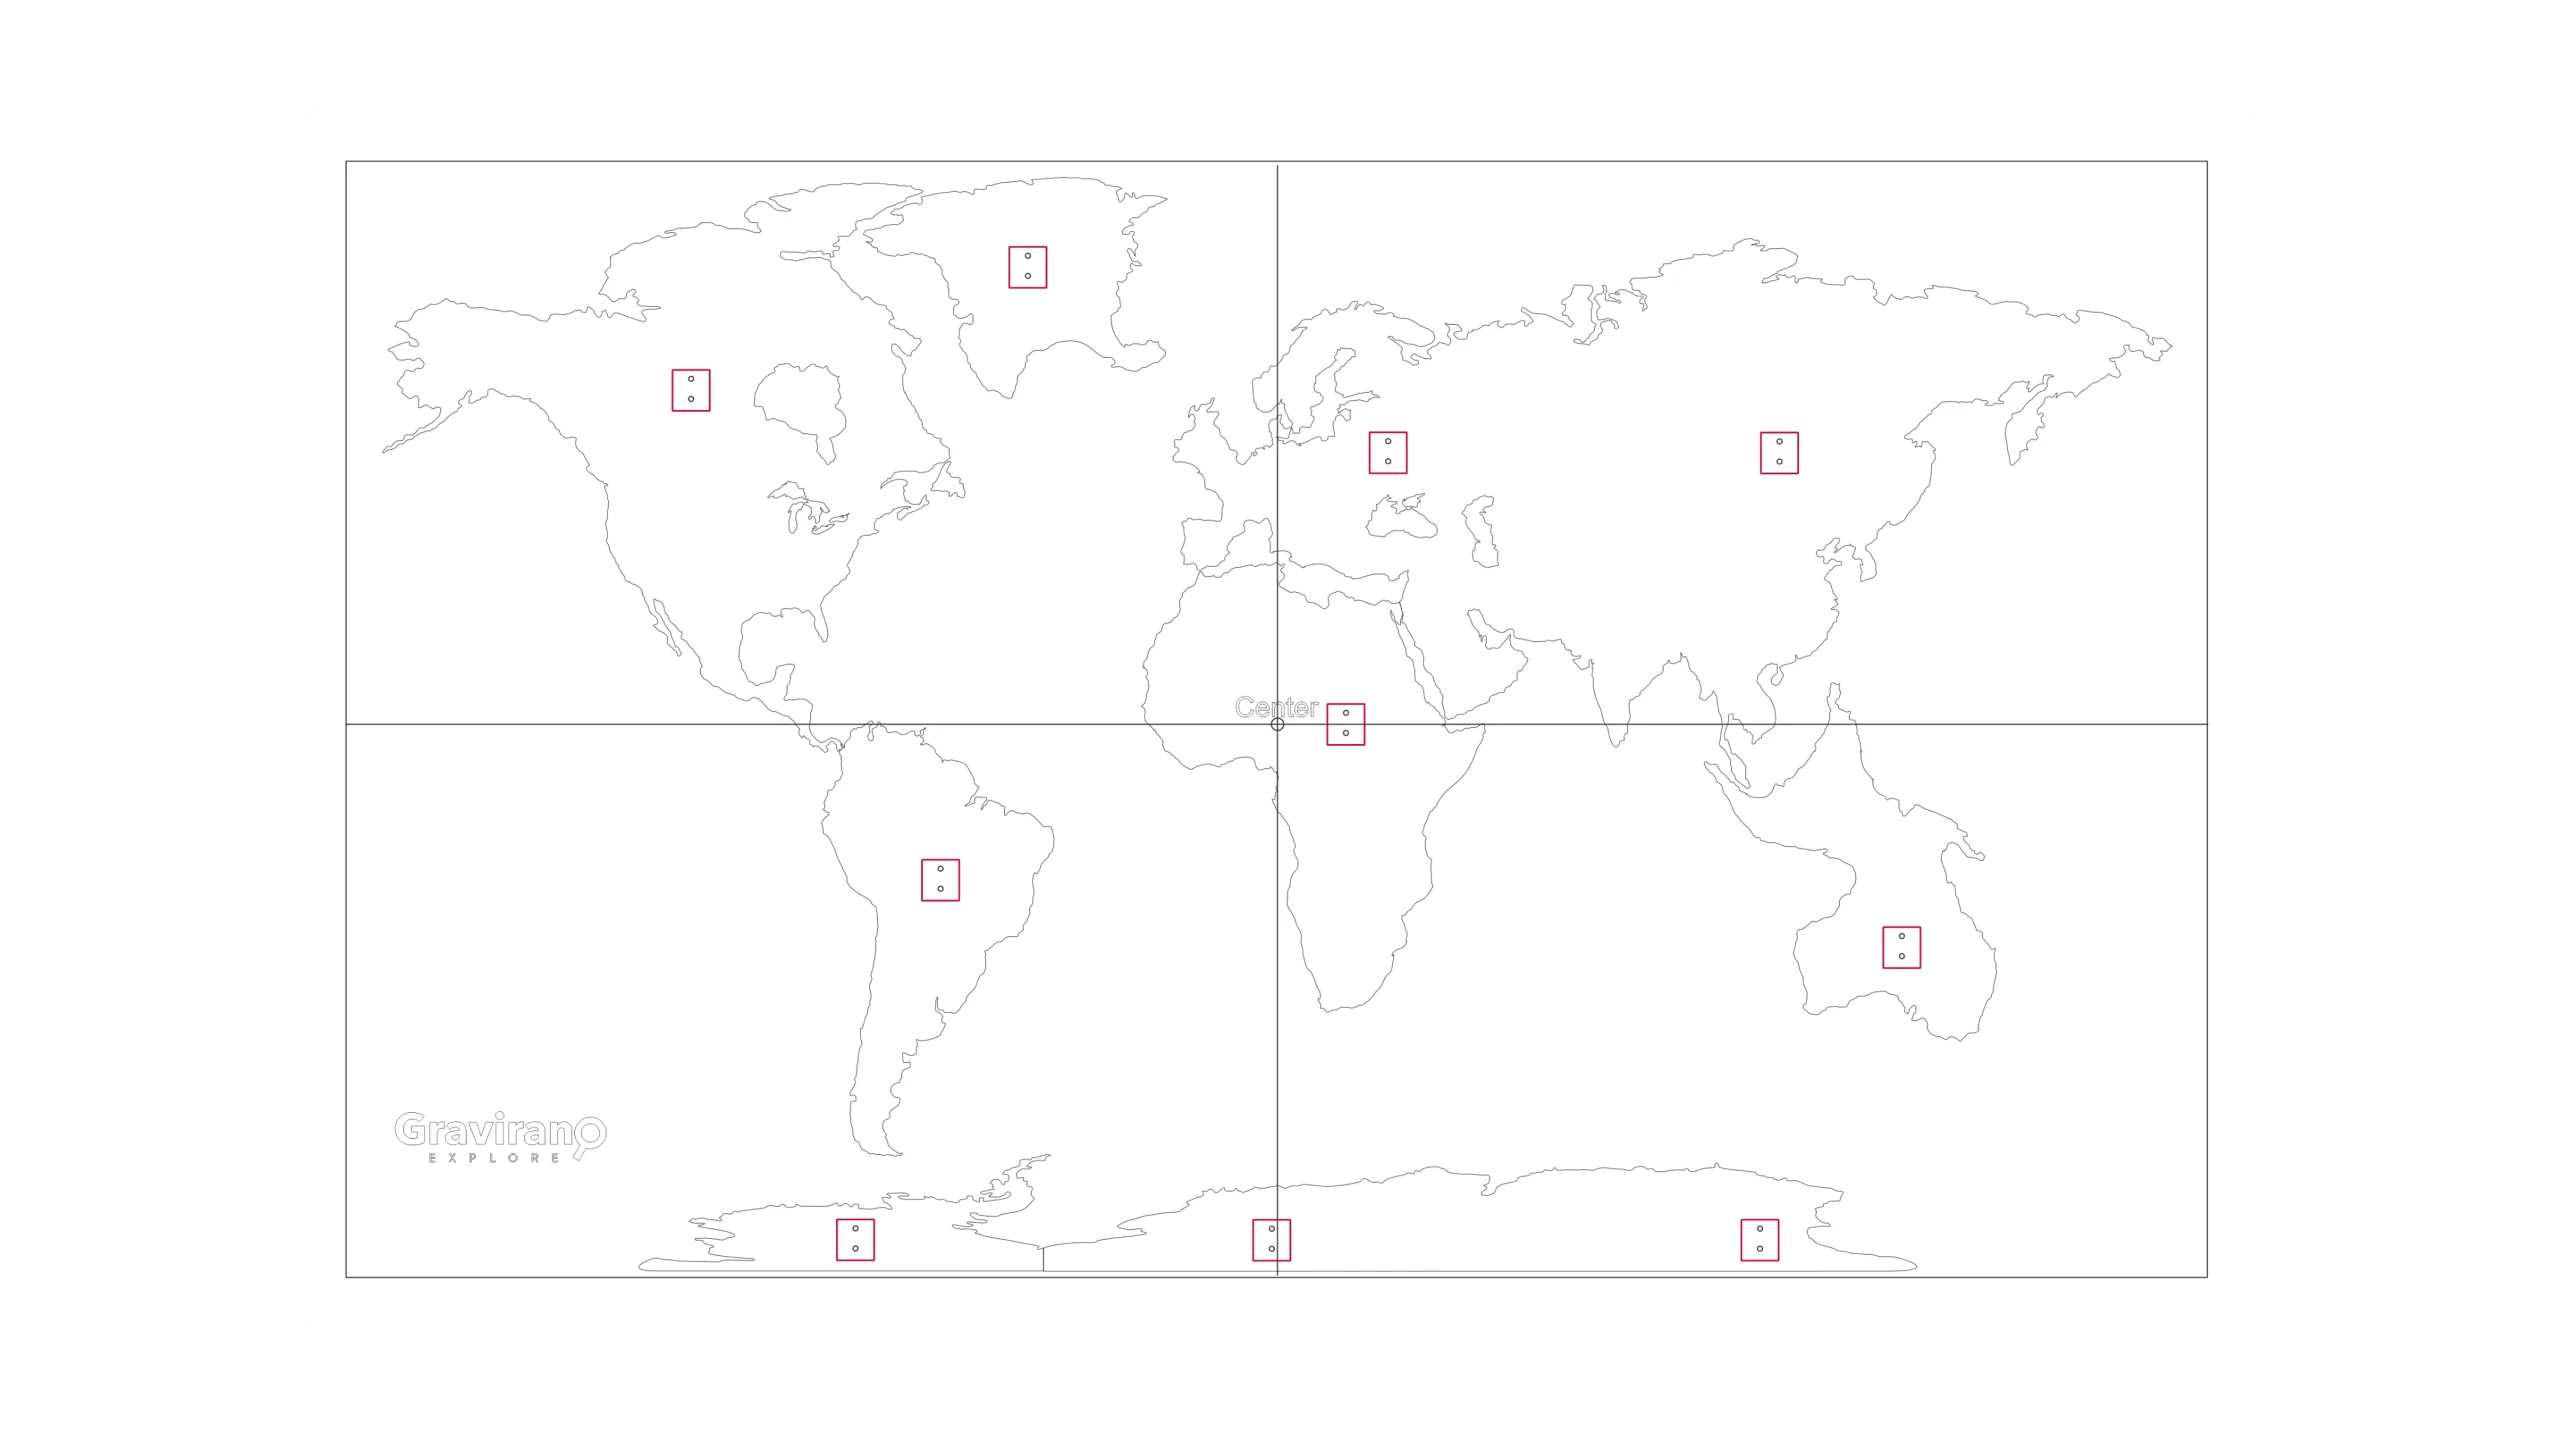
placing the template

01

Unfold the paper template and attach it to the wall with masking tape.

02

At the places marked for mounting (the rectangles with circles), drill holes suited to the type of wall:

03

Once you have drilled the holes,remove the template from the wall.

1

Unfold the paper template and attach it to the wall with masking tape.

2

At the places marked for mounting (the rectangles with circles), drill holes suited to the type of wall:

3

Once you have drilled the holes, remove the template from the wall.

!IMPORTANT!

For the wall types use:

Concrete/brick → drill + wall plugs
Plasterboard → plasterboard anchors

Mounting the spacers

Insert a wall plug into the hole and screw in the backs
of the black spacers.

Placing the continents

Recommended order for placing the pieces:

Antarctica ➝ South America ➝ North America ➝ Greenland ➝ Africa ➝ Europe ➝ Asia ➝ Australia

They are placed by sliding the individual pieces onto the spacers fixed to the wall.

01

Recommended order for placing the pieces:

Antarctica ➝ South America ➝ North America ➝ Greenland ➝ Africa ➝ Europe ➝ Asia ➝ Australia

They are placed by sliding the individual pieces onto the spacers fixed to the wall.

02

Connecting the LED backlight

01

Once all the continents are in place, connect the LED cables using the connectors in this order:

Antarctica ➝ South America ➝ South America ➝ North ➝ America ➝ North America ➝ Greenland ➝ Europe ➝ Asia ➝ Africa ➝ Asia ➝ Australia

02

Make sure all connectors are firmly and securely connected.

Plug the main power cable into a socket.

03

Use the remote control to choose a lighting mode:

📌 Steady light
📌 Pulsing effect
📌 Colour change and more

Mounting the extra elements

01

Using the double-sided mounting tape (included in the set),

stick on the islands, the ocean names and the decorative elements: compass, boats, planes, dolphins

02

Cut small pieces of tape, stick them to the back of each element, then press it against the wall.

congratulations!

Your wooden 3D map
with LED backlight is now on the wall!

Enjoy the unique atmosphere it creates at home,
in the office or in any other special place.